Simple Spring and JPA with Hibernate tutorial. Part 1: The basics
This is a very basic Spring application, using MVC for the web interface and JPA for persistence. As the JPA implementation we will use Hibernate. However, it is fairly easy to switch to another JPA implementation such as EclipseLink (we will look at how to do this in a later post). In as much as possible, this example uses convention over configuration, favoring brevity over exhaustive listing of options.
This example requires Maven to be installed and functional. I’m using version 3.0.4, but any relatively new version should suffice.
We’ll start taking a look at the pom.xml:
<project xmlns="http://maven.apache.org/POM/4.0.0" xmlns:xsi="http://www.w3.org/2001/XMLSchema-instance"
         xsi:schemaLocation="http://maven.apache.org/POM/4.0.0 http://maven.apache.org/maven-v4_0_0.xsd">
    <modelVersion>4.0.0</modelVersion>
    <groupId>test.tutorials</groupId>
    <artifactId>spring-hib-jpa</artifactId>
    <packaging>war</packaging>
    <version>1.0-SNAPSHOT</version>
    <name>spring-hib-jpa Maven Webapp</name>


    <properties>   <!-- 1 -->
        <springVersion>3.2.4.RELEASE</springVersion>
    </properties>

    <dependencies>

        <dependency>    <!-- 2 -->
            <groupId>org.springframework</groupId>
            <artifactId>spring-beans</artifactId>
            <version>${springVersion}</version>
        </dependency>

        <dependency>    <!-- 3 -->
            <groupId>org.springframework</groupId>
            <artifactId>spring-webmvc</artifactId>
            <version>${springVersion}</version>
        </dependency>

        <dependency>    <!-- 4 -->
            <groupId>org.springframework</groupId>
            <artifactId>spring-orm</artifactId>
            <version>${springVersion}</version>
        </dependency>

        <dependency>    <!-- 5 -->
            <groupId>org.hibernate</groupId>
            <artifactId>hibernate-entitymanager</artifactId>
            <version>4.1.9.Final</version>
        </dependency>

        <dependency>    <!-- 6 -->
            <groupId>jstl</groupId>
            <artifactId>jstl</artifactId>
            <version>1.2</version>
        </dependency>

        <dependency>    <!-- 7 -->
            <groupId>com.h2database</groupId>
            <artifactId>h2</artifactId>
            <version>1.3.161</version>
        </dependency>

        <dependency>    <!-- 8 -->
            <groupId>org.apache.tomcat</groupId>
            <artifactId>tomcat-dbcp</artifactId>
            <version>7.0.41</version>
        </dependency>

    </dependencies>
</project>
See below for detailed explanation of this file
- We define the Spring version as a property, since we’ll reuse this property for several dependencies. You could do the same thing for the other libraries we’re importing, but after a point, it becomes overkill. As of the writing of this tutorial, the latest stable Spring 3 is 3.2.4.RELEASE.
- The spring-beans package includes the basics to configure spring, and will be required in basically all spring applications.
- The spring-webmvc package provides front end functionality, which we’ll use to create our UI.
- The spring-orm package provides the infrastructure to map Object Relational Mapping (ORM) tools into Spring. Nowadays most new work is done using JPA (Java Persistence Architecture) interfaces. This module provides the glue logic between the ORMimplementation and your application, exposing standard JPA interfaces, while still allowing to take advantage of specialized features provided by the ORM framework of your choosing.
- The hibernate-entitymanager provides the Hibernate implementation, to do our database work behind the scenes.
- The JSTL api will provide us with some standard tools to make writing our JSPs a bit easier.
- In this simple example will use an embedded database, H2. This database will run within the Java process, so we can do our work without the need to have an external database server. ORM implementations allow you to move between a small embedded database an a big “enterprise” level database without big changes to your code.
- A database connection pool improves performance by keeping a pool of open connections that clients can use. In most J2EE applications the database connection pool is managed by the application server (Tomcat, Weblogic, JBoss, Glassfish, etc… ). For this example we’ll provide our own connection pool.
Now let’s look at src/main/webapp/WEB-INF/web.xml:
<web-app xmlns="http://java.sun.com/xml/ns/javaee" version="2.5">

    <servlet>
      <servlet-name>spring</servlet-name>
      <servlet-class>org.springframework.web.servlet.DispatcherServlet</servlet-class>
      <load-on-startup>1</load-on-startup>
    </servlet>

    <servlet-mapping>
        <servlet-name>spring</servlet-name>
        <url-pattern>*.html</url-pattern>
    </servlet-mapping>
</web-app>
The web.xml is simple enough, with a single Servlet, provided by Spring, and a single mapping, which will send requests ending in html to the Spring MVC servlet. Loading of the DispatcherServlet will trigger Spring to look for a configuration file named spring-servlet.xml. This is based on the servlet name and the -servlet.xml postfix. There are other ways of configuring Spring, but for now the spring-servlet.xml file will suffice:
<?xml version="1.0" encoding="UTF-8"?>
<beans xmlns="http://www.springframework.org/schema/beans"
       xmlns:xsi="http://www.w3.org/2001/XMLSchema-instance"
       xmlns:tx="http://www.springframework.org/schema/tx"
       xmlns:context="http://www.springframework.org/schema/context"
       xmlns:mvc="http://www.springframework.org/schema/mvc"
       xsi:schemaLocation="http://www.springframework.org/schema/beans
        http://www.springframework.org/schema/beans/spring-beans.xsd
        http://www.springframework.org/schema/context
        http://www.springframework.org/schema/context/spring-context.xsd
        http://www.springframework.org/schema/tx
        http://www.springframework.org/schema/tx/spring-tx.xsd
        http://www.springframework.org/schema/mvc
        http://www.springframework.org/schema/mvc/spring-mvc.xsd
        ">

    <context:component-scan base-package="test"/>  <!-- 1 -->
    <mvc:annotation-driven/>  <!-- 2 -->
    <tx:annotation-driven/>  <!-- 3 -->

    <bean id="viewResolver" class="org.springframework.web.servlet.view.InternalResourceViewResolver"> <!-- 4 -->
        <property name="prefix" value="/WEB-INF/jsp/"/>
        <property name="suffix" value=".jsp"/>
    </bean>

    <bean id="dataSource" class="org.apache.tomcat.dbcp.dbcp.BasicDataSource">  <!-- 5 -->
        <property name="driverClassName" value="org.h2.Driver"/>
        <property name="url" value="jdbc:h2:mem:test"/>
    </bean>


    <bean id="entityManagerFactory"
          class="org.springframework.orm.jpa.LocalContainerEntityManagerFactoryBean">  <!-- 6 -->
        <property name="dataSource" ref="dataSource"/>
        <property name="packagesToScan" value="test.model"/>
        <property name="jpaVendorAdapter">  <!-- 7 -->
            <bean class="org.springframework.orm.jpa.vendor.HibernateJpaVendorAdapter">
            </bean>
        </property>
        <property name="jpaProperties">  <!-- 8 -->
            <props>
                <prop key="hibernate.show_sql">true</prop>
                <prop key="hibernate.dialect">org.hibernate.dialect.H2Dialect</prop>
                <prop key="hibernate.hbm2ddl.auto">create-drop</prop>
            </props>
        </property>
    </bean>

    <bean id="transactionManager" class="org.springframework.orm.jpa.JpaTransactionManager"/>  <!-- 9 -->

</beans>- Component scan from the context namespace will crawl through the source tree starting at package
testand will wire all annotated objects. It will discover and wire any beans with the annotations@Controller,@Service,@Component, and@Repository. This will also enable configuration based annotation, which would normally be done with<context:annotation-config/>. - MVC is the user interface framework we’ll use, and
mvc:annotation-drivenwires http actions from beans that have@RequestMappingannotations. In the MVC (Model View Controller) pattern, these beans are the Controllers. - The
txnamespace allows configuring Spring’s transaction support. The elementtx:annotation-driveninstructs Spring to apply transaction functionality to beans that have@Transactionalannotations. Spring will inject a transaction manager into the proper beans. By convention, a transaction manager nametransactionManagerwill be injected, but can be configured explicitly by addingtransaction-manager="nameOfMyTransactionManagerBean"to thetx:annotation-drivenelement. In this case we’re definingtrasactionManagerfurther down the configuration file. - The
viewResolverallows Spring MVC to locate the JSPs that represent the View in the MVC pattern. In this case we’ll keep the JSPs in the/WEB-INF/jsp/directory, so that they cannot be hit directly, but accessed only through the controllers. - In this example, we’re providing the data source (instead of finding a data source provided by an application server). The properties passed must include at least the driver corresponding to the database to use, and a url. Since we are using an embedded database, nothing else is required, but most other databases will also require a username and password to be passed in as well.
- The entity manager factory provides access to the JPA implementation. In this case we’re using the adapter that allows using Hibernate. The factory requires several attributes to be passed in. In particular a
dataSource(in this case referencing the one created in point #5) and and package to scan for JPA entity classes. In this case we’re scanning thetest.modelpackage for classes annotated with@Entity. - The
jpaVendorAdapterproperty takes a class implementingJpaVendorAdapter. In this case we provide the one appropriate for hibernate. Inside this property we further configure the adapter, however the syntax is more limited than what can be done passing properties directly as we do here in the next element. - The
jpaPropertiesallows to pass raw properties to the JPA implementation, bypassing the Spring ORM adapter. In this case we pass parameter so that Hibernate will show us the SQL it’s executing, the type of database we’ll be connecting to, and finally instruct hibernate to recreate the schema every time the EntityManager is started. In this case, the first two parameters could have been expressed inside thejpaVendorAdapterin a less verbose way. However, the last parameter cannot be expressed insidejpaVendorAdapter. The only parameter than can be expressed forhibernate.hbm2ddl.autoinside thejpaVendorAdapterisupdate. By settinghibernate.hbm2ddl.autotocreate-dropwe get access to a hibernate specific functionality that allows us to execute a file (calledimport.sql) after the database structure has been created. You can find more information here. - The transaction manager we are using is appropriate to the JPA infrastructure we’re using. By default this bean will be injected with an entity manager factory bean called
entityManagerFactory. This can be overridden by passing a property with nameentityManagerFactory.
Looking at the import.sql file mentioned before will give us an idea of how the database looks, but we’ll into more detail how it looks when we examine the entity class:
INSERT INTO PERSON (firstName,lastName) VALUES ('Joe','Doe') ;Now let’s look at the actual code, starting with the Person entity class. An application will most likely have more than one entity class, but for this example we’ll make do with only one. If you need more, just add them to one of the packages that will be scanned.
@Entity //1
public class Person {

  @Id //2
  @GeneratedValue //3
  private Long id;
  private String firstName;
  private String lastName;
  private String email;

  // Getters and setters removed for brevity.
}- The
@Entityannotation specifies that the class is an entity. At the class level, other annotations can be applied, for example@Table, to specify a table. Otherwise defaults will apply. In this case the table name defaults toPerson(the class name with the first letter capitalized. - The
@Idannotation specifies that this field is the primary key of the table.
A few notes when declaring entity classes:
- By default, all fields are persisted, even if not annotated. If you want to exclude a filed, add the
@Transientannotation. - You can specify the column name (among other properties) using the
@Columnannotation. If you omit this annotation, the default column name will be used (field name with capitalized first letter). - Annotations can be placed on the fields, or on the getters. Placing them on the getters will signal the JPA implementations to use JavaBean property access instead of field access. It is however recommended to not mix both in a single entity class.
Now we’ll look at the DAO (Data Access Object) inside src/main/java/test/dao/impl/PersonDAO.java. At this point it’s fairly simple, and just implements a single method from an interface:
@Repository   //1
public class PersonDAO  implements IPersonDAO {

    @PersistenceContext
    private EntityManager em; //2

    @Override
    public List<Person> findAll() {
        Query query = em.createQuery("SELECT e FROM Person e"); //3
        return (List<Person>) query.getResultList();
    }

}- The
@Repositoryannotation is a Spring stereotype, which is similar to@Component. The only extra functionality it provides is SQL exception translation. - The
EntityManageris injected thanks to the@PersistenceContextannotation. This is the interface that we use to interact with the JPA system. - Our lonely method uses JPQL (Java Persistence Query Language) to query and return a list of all Persons. This is executed through the
EntityManager.
The DAO is not called directly, but rather through service layer. Lets look at src/main/java/test/service/impl/PersonService.java:
@Service //1
@Transactional //2
public class PersonService implements IPersonService{

    @Autowired //3
    private IPersonDAO personDAO;

    @Override
    public List<Person> findAll() {
        return personDAO.findAll(); //4
    }

}- The
@Serviceannotation is another Spring stereotype. However,@Servicedoes not provide any additional functionality by default. You can later implement special handling based on this annotation. - The
@Transactionalannotation specifies that method calls on this class. You can specify several parameters, but by default it will require transactions, reusing a current one or starting a new one. This is good enough for a lot of usages, but can be tweaked if needed. - The DAO is injected with
@Autowired. Where possible we use interfaces. - The actual call to the DAO is fairly simple. However, it’s worth noting that if we called more than one method in the DAO, both calls will be run inside the same transaction.
The web controller provides an “action” that users can invoke through their web browsers. Lets look at src/main/java/test/controllers/TestController.java:
@Controller //1
public class TestController {

    @Autowired //2
    private IPersonService personService;

    @RequestMapping("/view") //3
    public ModelAndView view() {
        ModelAndView ret=new ModelAndView("view"); //4
        List<Person> persons=personService.findAll();
        ret.addObject("persons",persons); //5
        return ret;
    }
}- The
@Controllerannotation is yet another specialization of@Component, used to specify that the class is a web controller. However, this needs to go together with one or more@RequestMappingannotations to actually become accessible. - The person service is autowired, just like we wired the DAO into the service in the previous file.
- The
@RequestMappingdefines what url this controller will respond to. In this case we’re mapping to/view.html. The html extension comes from the mapping in the web.xml. Further diferenciation can be done based on other elements of the request, such a method, agent, etc. This annotation can be applied to a method, or to a type AND method. If applied to a type, method level annotation are also required, and the paths declared on the method annotation will be appended to path defined in the type annotation. - The ModelAndView is one of the many return types that
@RequestMappingannotated methods can return, and is one of the most useful ones. It allows us to define the view, and well as the model (data) that will be rendered by the view. In this case the constructor takes a view name. This view name will be resolved to/WEB-INF/jsp/view.jspby theInternalResourceViewResolverwe defined inspring.xml. - The last step is to populate the model data, in this case a list of all persons fetched by our person service. This list will be available in the view under the attribute name
persons.
The last part is the view, which is a regular JSP (Java Server Pages).
This lives in src/main/webapp/WEB-INF/jsp/view.jsp:
<%@ taglib uri="http://java.sun.com/jsp/jstl/core" prefix="c" %>  <%-- 1 --%>
<html>
    <body>
        <table border="1">
            <tr>
                <th>First Name</th>
                <th>Last Name</th>
            </tr>


            <c:forEach items="${persons}" var="person"> <%-- 2 --%>
                <tr>
                    <td>${person.firstName}</td>    <%-- 3 --%>
                    <td>${person.lastName}</td>
                </tr>
            </c:forEach>
        </table>
    </body>
</html>- We declare the core tag library. This provides basic control functionality, and is part of the Java Server Pages Standard Tag Library.
- The core tag library allows an easy way to iterate over lists. In this case we iterate over the “persons” object we returned from the controller method inside the ModelAndView object.
- For each person we iterate over, we print the first and last name.
We can then compile and run our small application with:
mvn tomcat:run
You can see the product of our work at http://localhost:8080/spring-hib-jpa/view.html:
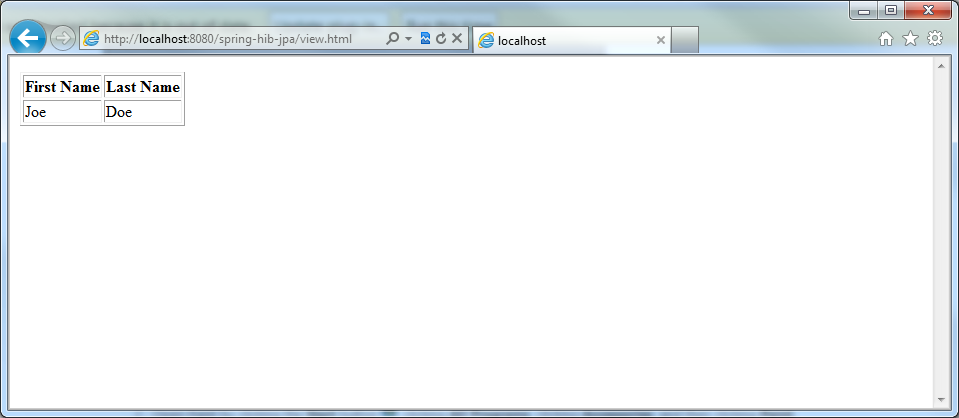
This is a very basic example, but we’ve explored all of the plumbing required to build a database backed web application. In future posts we’ll build on top of this application, and add feature such as, data entry, security, webservices, etc. Source Code
You can clone the code and play with it from github:
git clone https://github.com/aolarte/tutorials.git
The finished code is contained in directory spring1_basics.
Simple Spring and JPA with Hibernate tutorial series:
- Part 1: The basics
- Part 2: Forms and persisting entities
- Part 3: Simple security
Comments